How to create a group in Gmail?
On this page
Managing email distribution lists can be a tedious task. Fortunately, Gmail groups offer an efficient solution. A Gmail group email is a way to organize your contacts and send emails to a specific group of people at once. It’s like creating a mailing list within Gmail.
Instead of typing out multiple email addresses every time, you can just type the group name. This can save you a lot of time, especially if you email the same group of people frequently.
This guide is all about making Gmail groups work for you. We will show you how to create & use them and make your communication smoother. We will talk about why groups are helpful, give you easy steps to follow, and share some useful tips for managing your group emails.
By the end of this guide, you will know how to use Gmail groups to communicate better with your network.
Why to create groups in Gmail?
Creating groups in Gmail can help you save quite a lot of time. Instead of manually entering multiple email addresses you can simply select the group name, every time you want to send a message to the same group of people.
When you are using a group, you make sure that every intended recipient is added. This eliminates the risk of accidentally forgetting someone or mistyping an address.
The Gmail group helps you to keep your contacts organized. You can make different groups based on your use case. This makes it easy to find the right group to email.
When you share any information via the group, all the team members stay informed about the project. You can send updates, share documents, and have discussions all within the group email.
So, let’s see how you can create a group in Gmail.
How to create a group in Gmail?
Follow the below step by step guidelines to create a group in Gmail
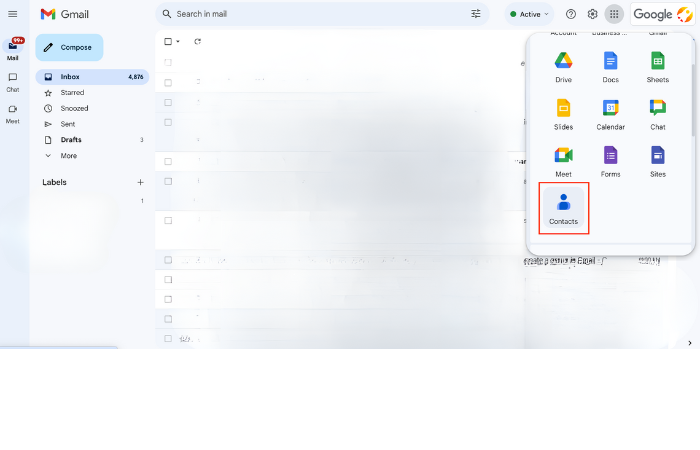
Step 1: Go to Google contacts
Click on Google apps tab and look for ‘contacts’.
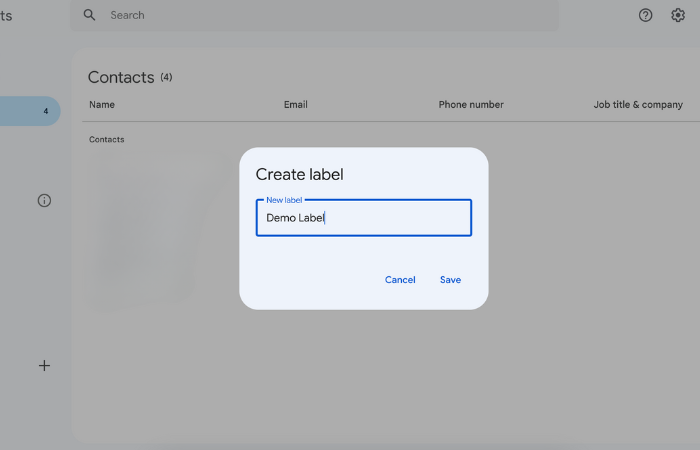
Step 2: Create ‘label’ as per your use case

Step 3: Name your label
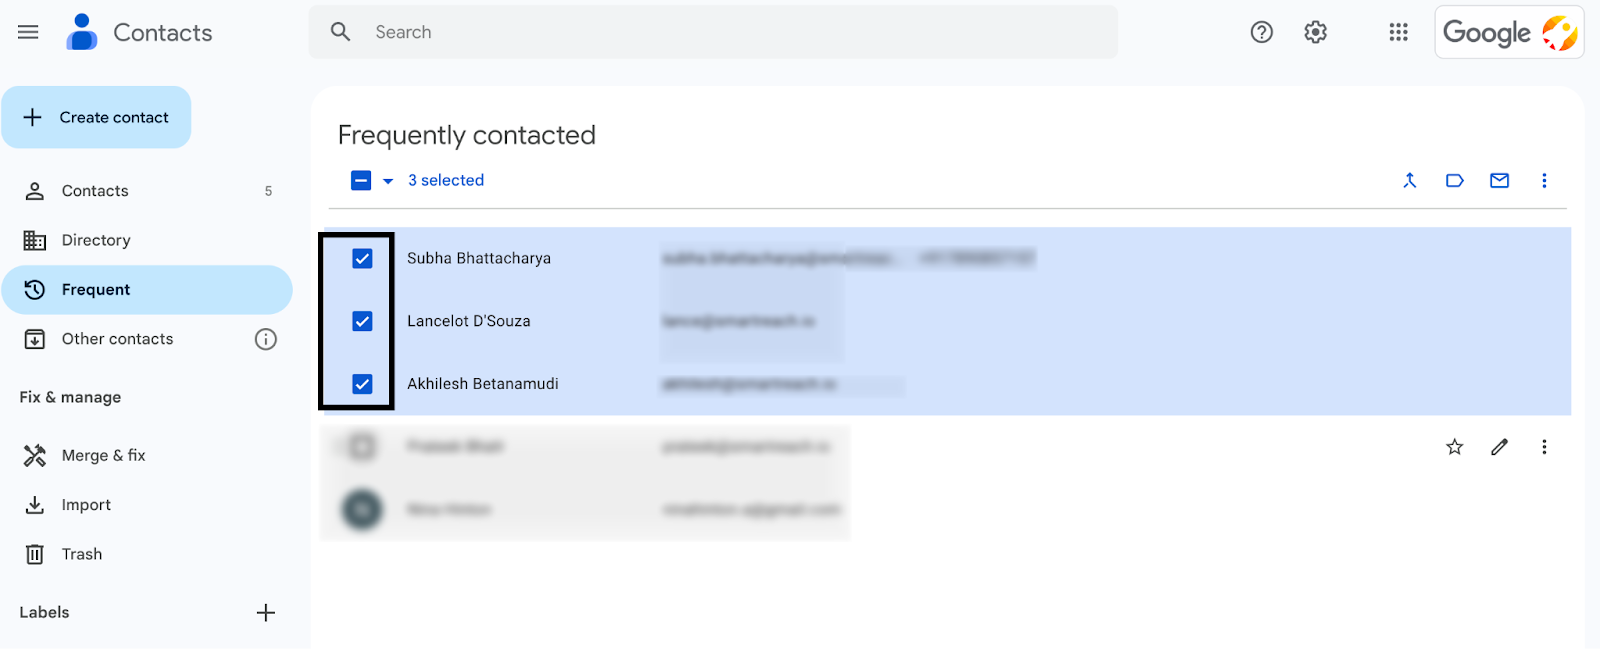
Step 4: Add contacts
Next you have to add your contacts. To do so, you can either select from ‘frequent’ or ‘directory’. If in case you are creating a group where your contacts are not already available, then you can create contact as well.

Step 5: Select the contacts
Select all the contacts you want to include in your group email.
Step 6: Assign the label and click apply
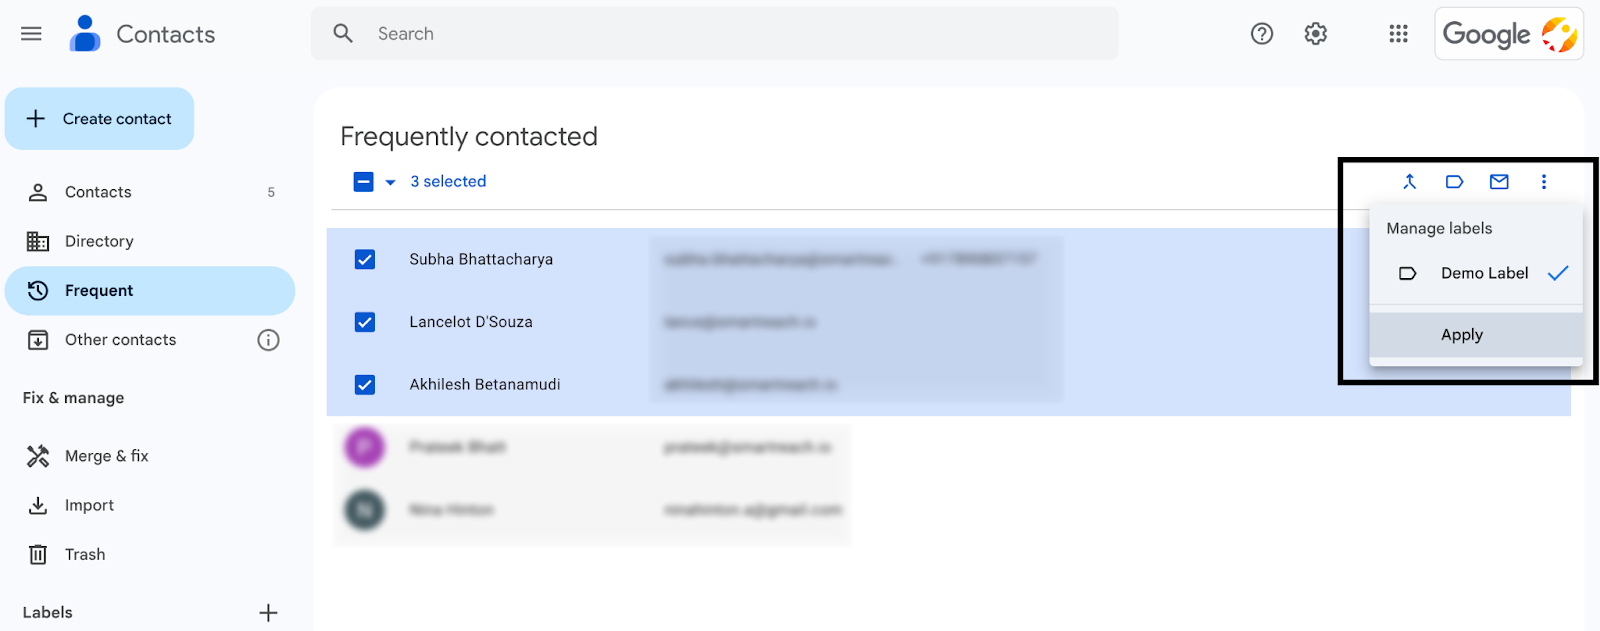
Now you have created a group in gmail. Next let’s check how you can send a group email in Gmail.
How to send a group email in Gmail?
For sending group email on Gmail, head over to your your Gmail account and follow the below steps.
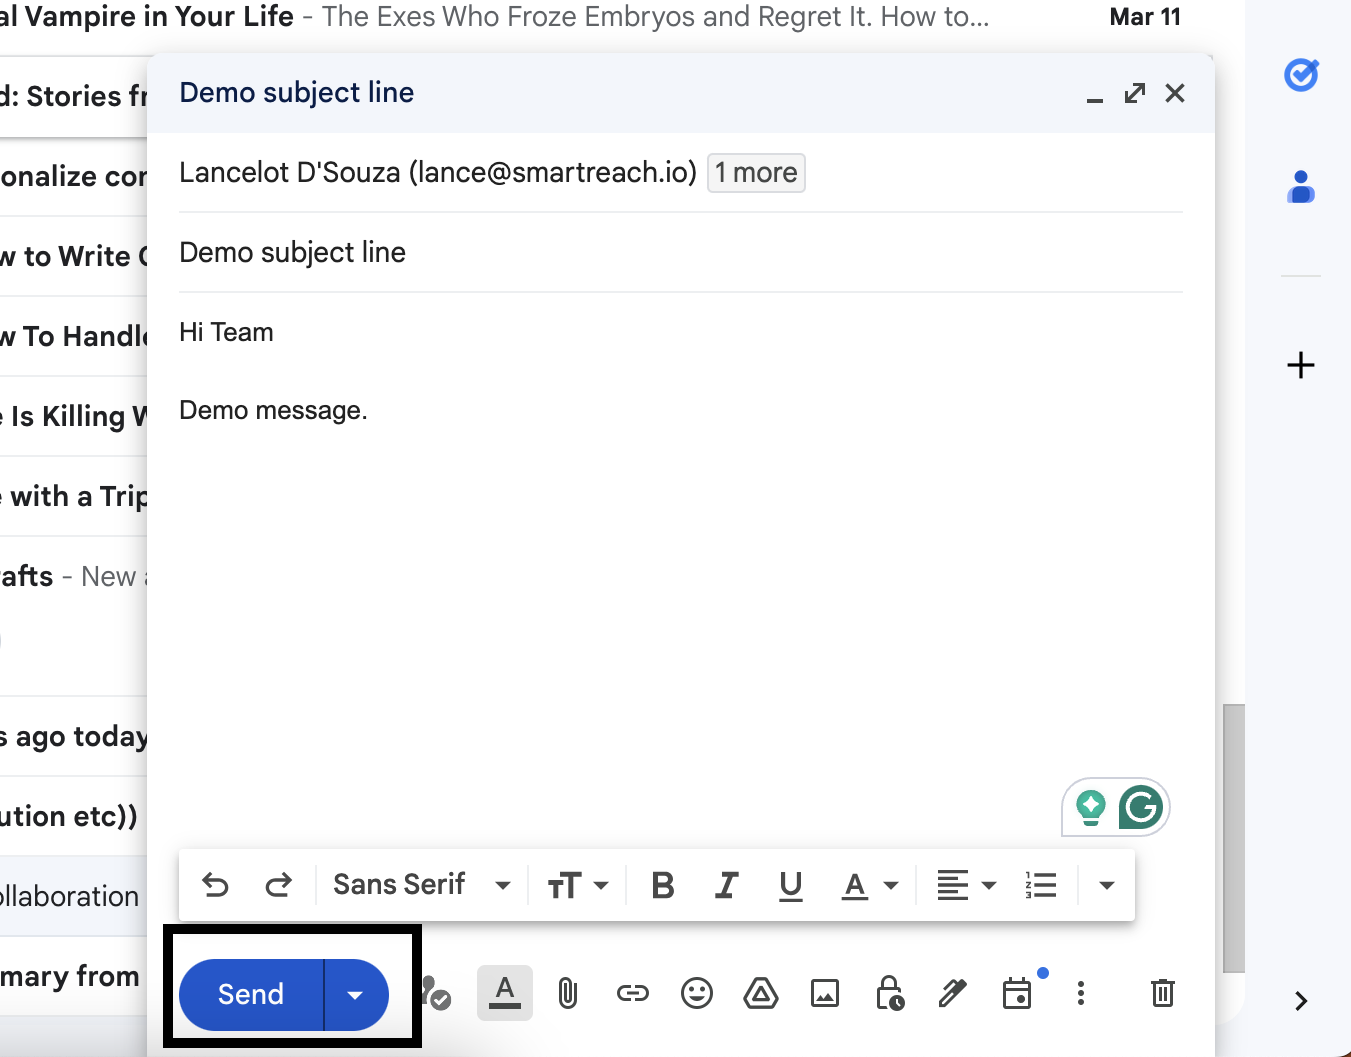
Step 1: Click on ‘Compose’
Type the name of your Gmail group in the “To” field. You’ll get a list of matching contacts and groups—pick the one you want to email. If you have more than one Gmail group, you can add them individually here as well.

Step 2: Write your message
Write your required message, proofread and click on send.
Great job! Now you understand how to make a Gmail group and use it for sending emails.
Additional tip:
If you’re utilizing Gmail for group email communication, consider leveraging the SmartReach Shared Inbox for enhanced functionality. This tool offers a range of benefits, including:
- Improves team communication by providing a centralized platform for collaboration.
- Promotes transparency within your team, ensuring that everyone has access to relevant information.
- Gain a clear and insightful perspective on your sales pipeline
- Understanding of how your team is performing
Tips to create group email in Gmail
Here are some tips that can help you manage your group email.
Consistently update your group.
You should regularly maintain and update your Gmail groups. It is crucial for effective communication. You can use the Merge & Fix feature to eliminate any duplicate contacts, ensuring a clean and organized group list.
Remove the outdated contacts and correct any typos or misspellings in contact names. Increase the quality of your contact records by including additional details such as department names, phone numbers, or time zones.
Include appropriate salutation.
Write your greeting based on your relationship with the group. For close-knit teams, casual greetings like “Hi all” or “Hey team” work well.
Wherever possible personalize salutations for smaller groups by including members’ names. In a formal group you can go for more formal greetings such as “Greetings team” or “Hello (Group name).”
Write an engaging subject line.
Writing engaging subject lines is essential to capture the attention and motivation of your email group. It should be short and specific.
If you are seeking specific actions or insights, consider adding a deadline or posing an open-ended question. This would encourage prompt and relevant responses from your group members.
Personalize the group emails.
You can start personalizing your group email with a quick outline of shared qualities such as behaviors, interests, or habits. For larger groups, consider segmentation to refine personalization efforts.
Use these shared details to draft conversational copy, add humor or jokes, and highlight different members of the group.
Clear and concise label names.
Organizing your Gmail groups effectively involves the use of clear and specific labels. Label names should be concise, correct, and easily understood by all group members.
This would help to avoid confusion, check for spelling and punctuation errors, and consider writing labels from a new user’s perspective.
Conclusion on how to create a group in Gmail
Setting up email groups ensures your closest contacts stay in the loop and saves you time. It’s a handy way to keep your address book neat and organized.
With this simple guide, you’re all set to build strong group connections on Gmail and other platforms. Don’t wait any longer – create your first group today and start connecting effortlessly.
Stop juggling tools
Book more meetings on every channel
Join 5,000+ teams running multichannel outreach from one sequence, with deliverability built in.