How to set up SPF, DKIM & DMARC to keep emails out of spam
On this page
If you’re doing cold email outreach, newsletters, or product updates, poor email deliverability means lost leads and missed revenue.
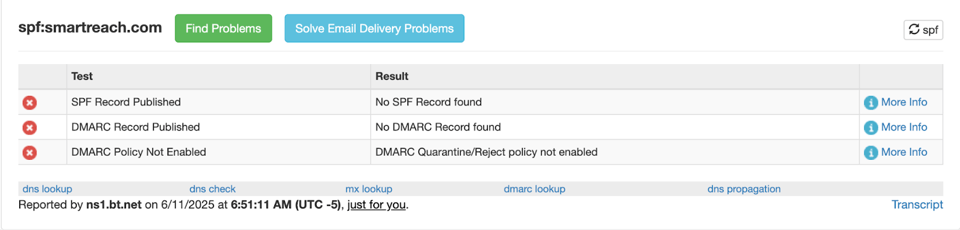
And the technical issues relating to SPF, DKIM, and DMARC set-up is one of the culprits behind it.
SPF, DKIM & DMARc are email authentication protocols (read “tools”) that tell inbox providers like Gmail and Outlook that you are a trusted sender.
Without proper setup, even professional emails get marked as spam.
This guide shows you exactly how to set up SPF, DKIM & DMARC, step-by-step.
First thing first.
SPF vs DKIM vs DMARC: Email authentication protocols explained
- SPF (Sender Policy Framework)
It is like a guest list. It tells receiving mail servers which email servers are allowed to send mail for your domain.
For example, if you send newsletters via Mailchimp and sales emails via Gmail, SPF tells inboxes both are legit sources.
Without it, anyone can pretend to send from your domain.
- DKIM (DomainKeys Identified Mail)
It is like sealing a letter with a signature.
DKIM adds an encrypted signature to each email.
If someone tampers with the content in transit, the signature breaks and the email fails authentication.
- DMARC (Domain-based Message Authentication, Reporting & Conformance)
This is your bouncer.
DMARC checks whether SPF or DKIM passed and then decides what to do—deliver, quarantine, or reject.
It also sends you reports so you can spot issues or abuse attempts.
Together, they form your email’s authentication system.
For more details on the email authentication protocols, check out –
What is email authentication, and why does it matter for my email deliverability?
How to set up email authentication: SPF, DKIM, DMARC tutorial
Now let’s set-up these records one by one. Follow these steps carefully –
A) Setting up SPF: Authorize your sending servers
SPF setup means creating a DNS record that lists your authorized mail servers.
Here’s exactly how to do it.
Step 1→ Find your current SPF record
First, check if you already have an SPF record.
You can only have one per domain.
Go to mxtoolbox.com/spf.aspx.

Enter your domain and see if you already have an SPF record.
If you find one, you’ll modify it. If not, you’ll create a new one.
Step 2 → Identify your email services
List every email service that sends emails from your domain.
This includes:
- Your email providers (Gmail, Outlook, Zoho etc.)
- Marketing tools (Mailchimp, Constant Contact)
- CRM systems (Salesforce, HubSpot)
- Transactional email services (SendGrid, Mailgun)
- Any other tools that send emails
Write them all down.
Missing even one service will cause authentication failures.
Step 3 → Create or update your SPF record
Your SPF record includes all these services. Here’s the commone format:
| v=spf1 [your services] ~all |
Common service includes:
- Google Workspace: include:_spf.google.com
- Microsoft 365: include:spf.protection.outlook.com
- Mailchimp: include:servers.mcsv.net
- SendGrid: include:sendgrid.net
- Constant Contact: include:spf.constantcontact.com
Real example for a company using Google and Mailchimp:
| v=spf1 include:_spf.google.com include:servers.mcsv.net ~all |
Example for just Google workspace accounts:
| v=spf1 include:_spf.google.com ~all |
The ~all at the end is important.
It tells email servers to flag suspicious emails but not reject them completely. Before moving on, you can use an SPF record checker to preview how your record will be interpreted by mail servers.
Note: Avoid +all — it allows anyone to send on your behalf.
Step 4 → Add the SPF record to DNS
Now add this record to your domain’s DNS settings.
Log in to your domain registrar (GoDaddy, Namecheap, Cloudflare, etc).
The process varies by provider, but here’s the general approach:
A) For GoDaddy users:
- Log into your GoDaddy account
- Go to “My Products” then “DNS”
- Click “Add” under DNS Records
- Set Type to “TXT”
- Set Name to “@”
- Paste your SPF record in the Value field
- Click “Save”
B) For Cloudflare users:
- Log into Cloudflare
- Select your domain
- Go to the DNS tab
- Click “Add record”
- Set Type to “TXT”
- Set Name to “@”
- Paste your SPF record in Content
- Click “Save”
C) For other domain providers:
The steps are similar.
- Go to DNS settings
- Add a TXT record
- Name: @ or your root domain
- Value: Your SPF string
Step 5 → Test & verify the SPF record
Wait 2-4 hours for DNS changes to take effect.
Then test your record:
Go to MXToolbox.com.
Enter your domain. Click “SPF Record Lookup.”
You should see your new record listed.
Send a test email to yourself.
Check the email headers.
You should see “SPF: PASS” in the authentication results.
__________
B) Setting up DKIM: Add digital signatures to the emails
DKIM requires generating encryption keys and adding them to your DNS.
Your email service providers (Gmail, Outlook etc.) usually handles the technical parts.
Step 1 → Generate DKIM keys in your email provider
A) For Google Workspace:
- Go to admin.google.com
- Click “Apps” then “Google Workspace” then “Gmail”
- Click “Authenticate email”
- Click “Generate new record”
- Enter a selector name (like “google” or “selector1”)
- Choose 2048-bit key
- Click “Generate”
Google will show you a DNS record to add.
Copy this entire record.
B) For Microsoft 365:
- Go to security.microsoft.com
- Navigate to “Email & Collaboration” then “Policies & Rules”
- Click “Threat policies” then “DKIM”
- Select your domain
- Click “Create DKIM keys”
- Copy the provided DNS records
C) For other email providers:
Check your provider’s help documentation. Search for “DKIM setup” or “email authentication.”
Step 2 → Add DKIM records to DNS
You’ll add the records your email provider gave you.
They look complex, but you just copy and paste them.
The record name usually looks like:
| selector1._domainkey |
The record value starts with: v=DKIM1; k=rsa; p=
A) Add DKIM record in GoDaddy:
- Go to DNS management
- Click “Add” under DNS Records
- Set Type to “TXT”
- Set Name to the exact name provided (like “selector1._domainkey”)
- Paste the entire value in the Value field
- Click “Save”
B) Add DKIM records in Cloudflare:
- Go to DNS tab
- Click “Add record”
- Set Type to “TXT”
- Set Name to the provided name
- Paste the value in Content
- Click “Save”
Step 3 → Enable DKIM signing
After adding the DNS records, enable DKIM in your email provider:
Google Workspace:
- Go back to the “Authenticate email” section
- Click “Start authentication” next to your domain
- Wait for verification (can take up to 48 hours)
Microsoft 365:
- Return to the DKIM section
- Toggle the switch to “Enabled” for your domain
Step 4 → Verify DKIM is working
Test your DKIM setup:
Use MXToolbox’s DKIM lookup tool.

Enter your domain and selector.
You should see your public key.
Send a test email. Check the headers for “DKIM: PASS” in the authentication results.
__________
C) Setting up DMARC: control and monitor email Use
DMARC brings SPF and DKIM together.
Step 1 → Start with a monitoring policy
Create a basic DMARC record for monitoring first, something like:
| v=DMARC1; p=none; rua=mailto:dmarc@yourdomain.com |
- p=none: Monitor only, take no action yet
- rua: Where DMARC reports will be sent
- Replace “yourdomain.com” with your actual domain.
This record:
- Sets policy to “none” (monitoring only)
- Sends reports to your email address
- Doesn’t block any emails yet
Step 2 → Set up email for reports
Create an email address to receive DMARC reports. You can use:
- dmarc@yourdomain.com
- reports@yourdomain.com
- Any existing email address
These reports show you authentication results for all emails from your domain.
Step 3 → Add DMARC record to DNS
Add the DMARC record to your DNS:
The record name must be: _dmarc
- For GoDaddy users:
- Go to DNS management
- Click “Add”
- Set Type to “TXT”
- Set Name to “_dmarc”
- Paste your DMARC record in Value
- Click “Save”
- For Cloudflare users:
- Go to DNS tab
- Click “Add record”
- Set Type to “TXT”
- Set Name to “_dmarc”
- Paste your record in Content
- Click “Save”
Step 4 → Monitor your reports
DMARC reports arrive daily or weekly. They show –
- How many emails passed or failed authentication
- Which IP addresses sent emails from your domain
- Potential security threats
Use tools like DMARCIAN to make these reports easier to read.
Step 5 → Strengthen your policy gradually
After monitoring for 2-4 weeks, you can strengthen your policy:
- Quarantine policy: v=DMARC1; p=quarantine; rua=mailto:dmarc@yourdomain.com
This sends suspicious emails to spam folders.
- Reject policy: v=DMARC1; p=reject; rua=mailto:dmarc@yourdomain.com
This blocks suspicious emails completely.
Only move to stricter policies after confirming your legitimate emails pass authentication.
Test your complete email authentication setup
After setting up all three protocols:
- Use MXToolbox to check each record individually
- Send test emails to different providers (Gmail, Outlook, Yahoo)
- Check email headers for authentication passes
- Monitor your DMARC reports for any failures
6 Helpful resources for testing the authentication records
- MXToolbox.com → Free DNS and email testing
- Mail-tester.com → Complete email deliverability analysis
- Google Postmaster Tools → Monitor your reputation with Gmail
- DMARCIAN → Analyze DMARC reports
- Google DKIM Set-up Guide
- Micorsoft 365 DKIM set-up Guide
Avoid these common email authentication mistakes
Here are some of the most common mistakes people make when setting up SPF, DKIM and DMARC records for email authentication.
#1 Common SPF mistakes:
- Including too many services (SPF has a 10 DNS lookup limit)
- Forgetting to include all email services
- Using the wrong syntax
#2 Common DKIM mistakes:
- Not enabling DKIM signing after adding DNS records
- Using weak 1024-bit keys instead of 2048-bit
- Adding records with incorrect names
#3 Common DMARC mistakes:
- Starting with strict policies instead of monitoring
- Not setting up email to receive reports
- Ignoring the reports once they start arriving
Get pre-configured Gmail & Microsoft 365 inboxes with SmartReach.io
Now you can avoid the hassle of these technical set-ups by buying custom secondary domains and mailboxes from SmartReach.io directly.
It’s always safer and more effective to send cold emails from custom domains and inboxes built for outreach.
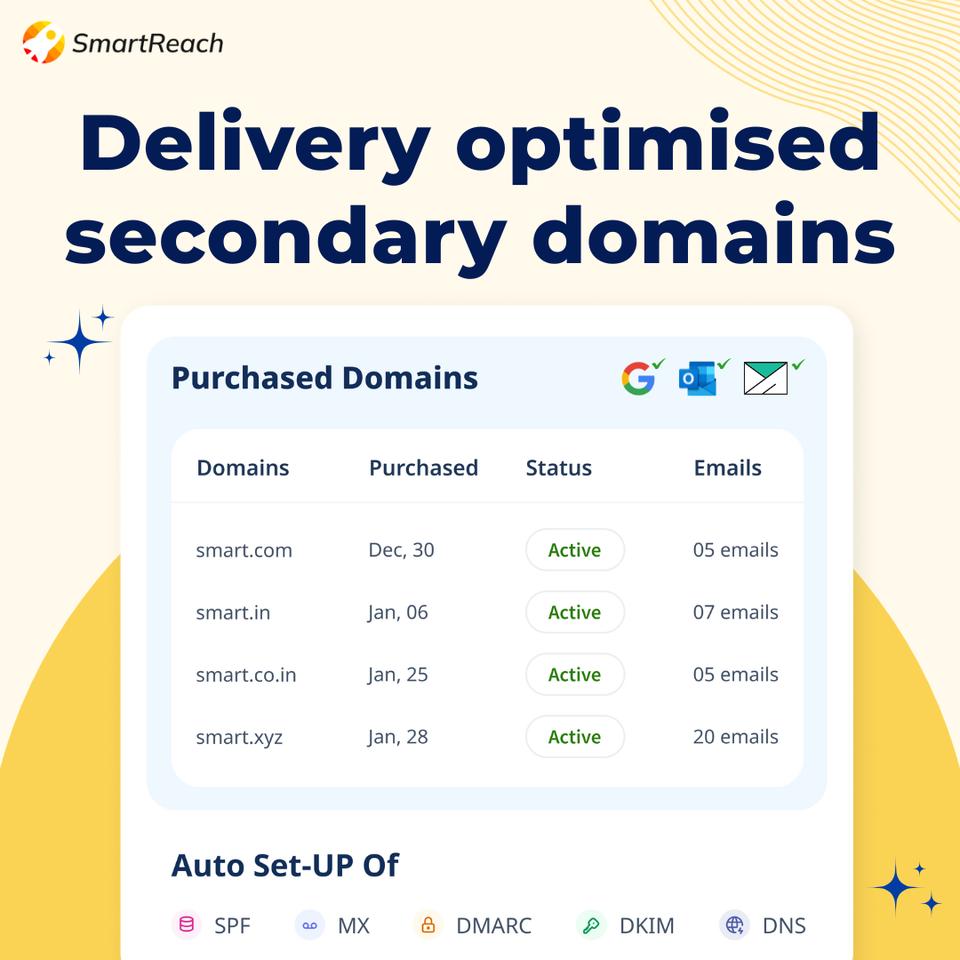
SmartReach.io offers a done-for-you cold email infrastructure — complete with verified domains and inboxes, already configured with SPF, DKIM, and DMARC.
Here’s what you get:
- Pre-warmed Microsoft & Gmail inboxes with high sender reputation
- Secondary domains attached ready for cold email use
- Pre-configured DNS rcords for ready-to-use
- SmartReach cold email platform integration
- Built-in email deliverability protection
- Monthly plans — no yearly commitments on domains and mailboxes
👉 Try SmartReach.io for FREE — no credit card required.
Final thoughts
Start with SPF since it’s the easiest to set up. Then add DKIM. Finally, implement DMARC monitoring.
Don’t rush the process.
Take time to test each step.
Monitor your email delivery rates as you make changes.
Within a few weeks, you’ll see better inbox placement.
Your emails will reach more people & campaigns will perform better.
FAQs: SPF, DKIM, and DMARC
What is SPF in email and why is it important?
SPF tells inboxes which servers are allowed to send mail for your domain. It helps stop spammers from impersonating you and boosts your deliverability.
How do I check if my SPF, DKIM, and DMARC are working?
Use tools like MXToolbox or send a test email to Gmail. Check the message headers—if you see “pass” next to SPF, DKIM, and DMARC, you’re set.
Can I use more than one email service with SPF?
Yes. Just include each sender’s domain in one SPF record. For example: v=spf1 include:_spf.google.com include:sendgrid.net ~all
What happens if I don’t set up DKIM?
Your emails may not be trusted by inbox providers. Without DKIM, emails could be altered or rejected by spam filters.
What does DMARC do exactly?
DMARC uses SPF and DKIM results to decide what to do with unauthenticated emails. It can also send you reports to catch suspicious activity.
Should I use ‘quarantine’ or ‘reject’ in my DMARC policy?
Start with p=none to monitor. Once things look clean, move to quarantine. If everything passes regularly, use reject to block bad mail.
Do I need technical help to set up SPF, DKIM, and DMARC?
You can do it yourself with your domain registrar and email provider’s guides. But if you’re unsure, a tech person or support team can help.
How long does it take for SPF, DKIM, and DMARC changes to work?
Most DNS updates take a few minutes to a few hours to propagate. Check back after 24 hours to confirm the setup is active.
Stop juggling tools
Book more meetings on every channel
Join 5,000+ teams running multichannel outreach from one sequence, with deliverability built in.